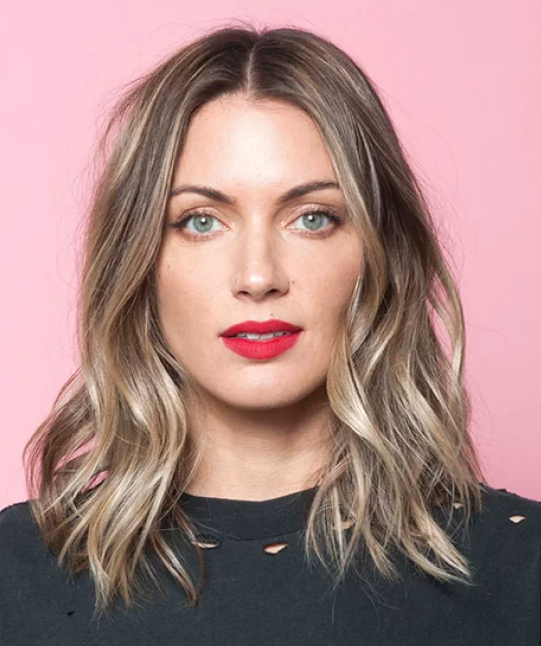
PHOTOGRAPHED BY DAVID CORTES.
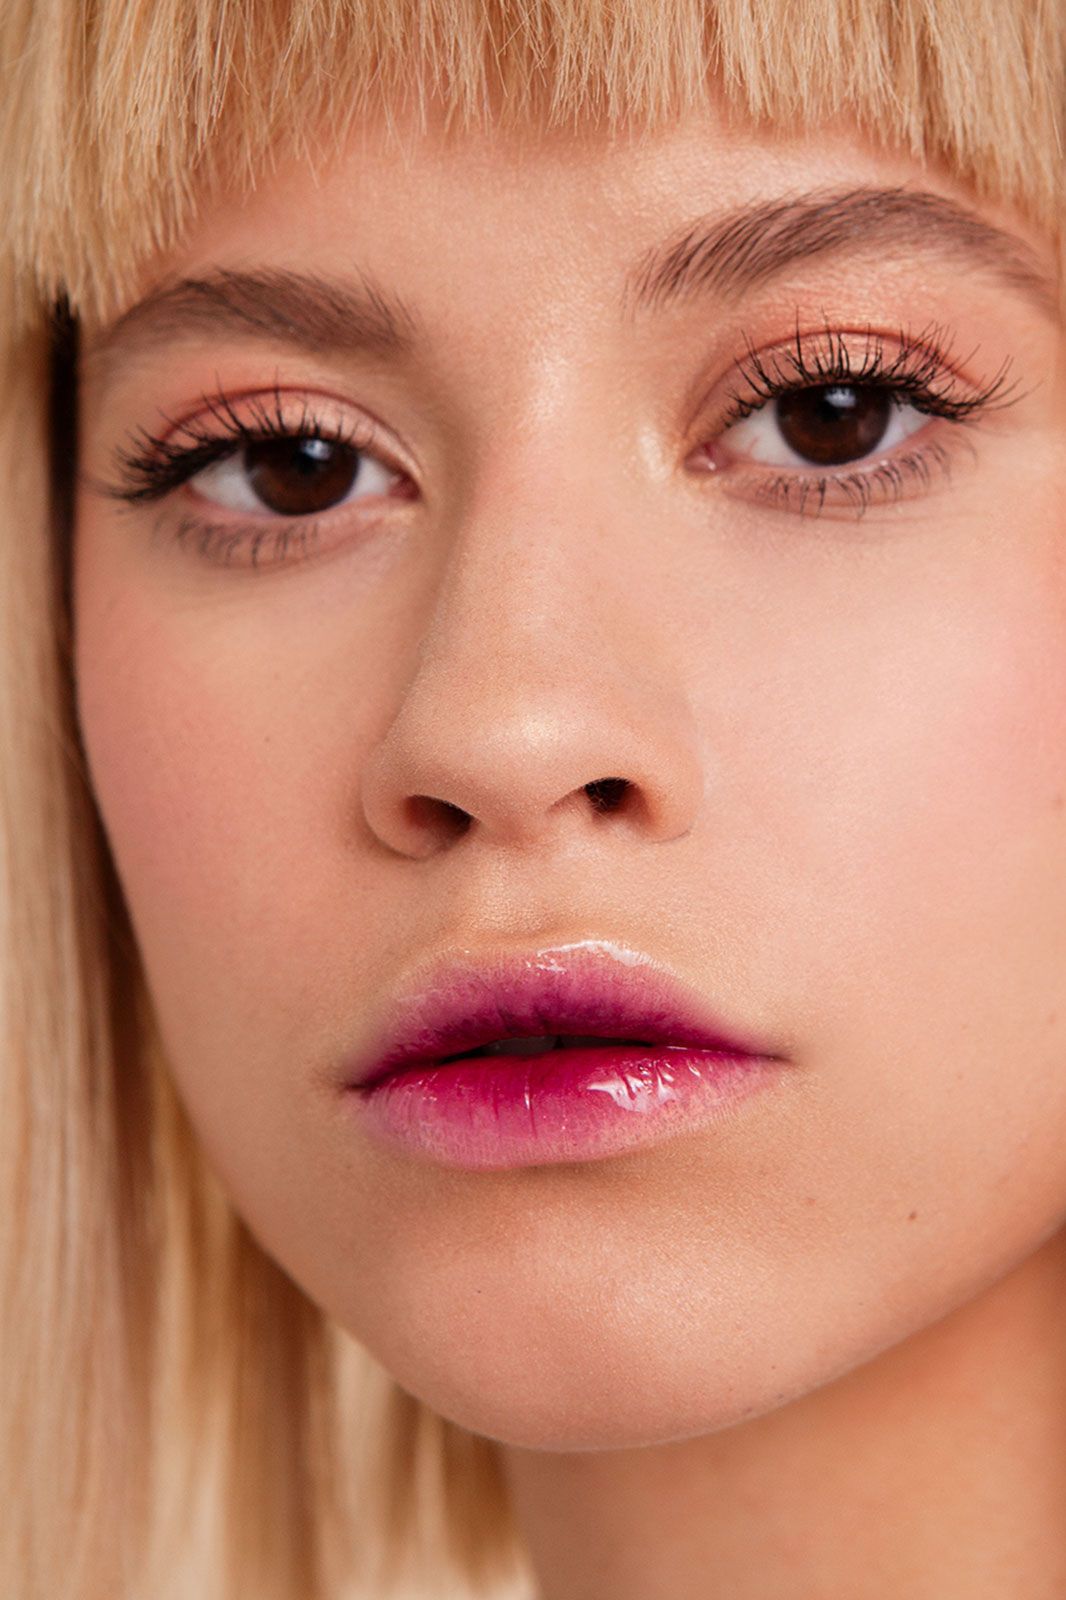
In real life, we apply our lipstick within the lines. Maybe we'll attempt an "artfully smudged" look, if we're feeling informal and kinda pouty. But a new lip trend is making us rethink those limits — by totally obscuring them with color and shine. The dripping, drenched effect isn't the work of Kylie Jenner, like you might expect. It's 31-year-old Los Angeles makeup artist Vlada Haggerty whom we have to thank for the pillowy, provocative style. But she's so much more than a dripping lip...
Haggerty grew up playing with her mom's makeup in Kiev, Ukraine. In fact, breaking into her mother's cosmetic bag and surprising her (not in a good way) with a face covered in red blush is her earliest memory. After spending years doing her friends' faces and wading through unfulfilling office jobs, Haggerty decided to follow her instincts and enroll in cosmetology school. Then, she headed west.
Arriving in the Bay Area of Northern California, Haggerty landed wedding gigs and a stint at Sephora, but it wasn't until she migrated to L.A. with her husband that it all came together. That's when she devoted herself to macro beauty photography — tight crops of detailed work, screaming with color and texture on screen.
Using a Canon 7D, a soft box, and a beauty dish, Haggerty started experimenting in her apartment. "I never thought it would go somewhere; I was just having fun," she says. The breakthrough: Haggerty began posting her work to Instagram, at least once a day for five months, and it took off like wildfire. "It’s such an amazing platform that's given me so many opportunities," she says. "Of course, it also has its problems. But that comes with the territory."
Haggerty isn't kidding. Nor is she afraid to speak her mind about her work, and the work of other makeup artists that's circulated without permission or credit. The question of creative ownership — and the rampant failure to respect it — has manifested as a watermark on Haggerty's images, something she sees as an eyesore. "I hate watermarks, and honestly, I shouldn't have to use them," she says.
Her push to validate her photography has brought out some haters, more than a few trolls, and lots of hurtful comments. It seems that the cerebral question, "What is art?" can inspire some pretty lowbrow remarks. But Haggerty's handiwork tapped right into our beauty-loving brains (and all the rosy thoughts in them), so we visited her studio.
There's no shortage of jaw-dropping macro looks on Haggerty's Instagram, so when we teamed up on an L.A. beauty shoot, we took a slightly different approach. Fret not, her infamous rose-gold drip lip is represented, but expect to see it, and four more looks, in a different light. Ahead, you'll view Haggerty's work through a different lens, slightly pulled back — but just as experimental.

PHOTOGRAPHED BY DAVID CORTES.
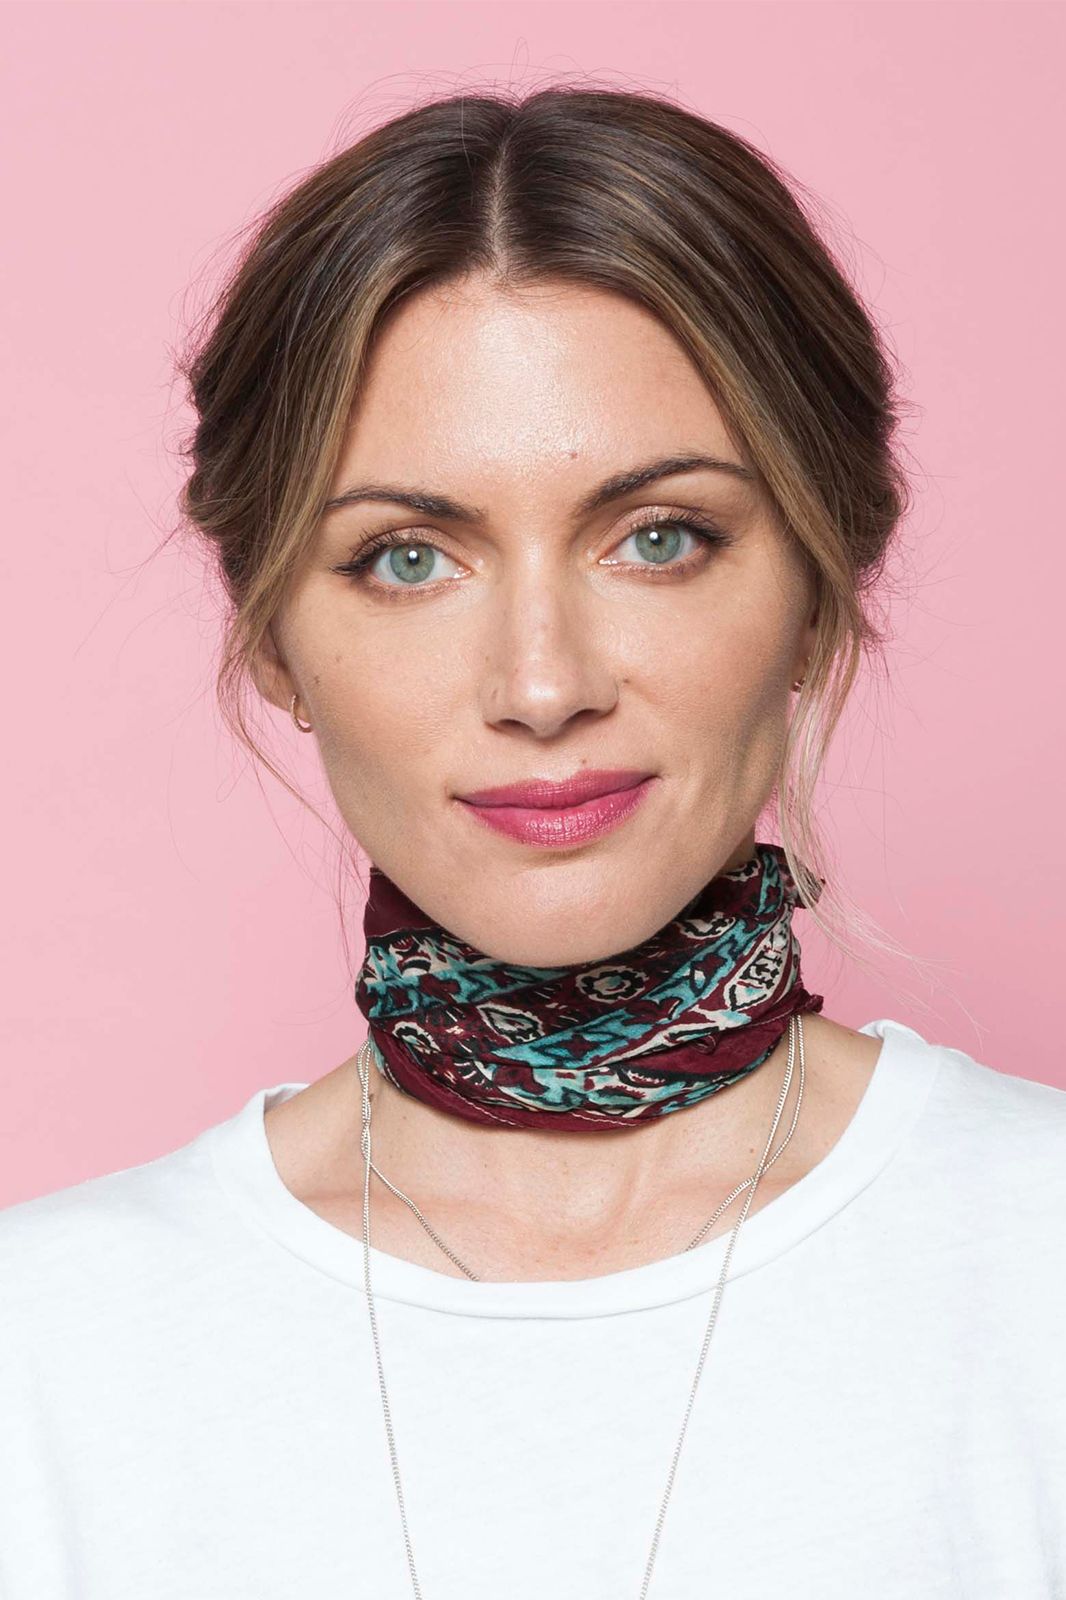
The Fade
There's a trick to Haggerty's take on the ombré trend — by far the most wearable look from our shoot. "I prepped the lip with concealer," she says. "Just dab it all over the lip, but don't powder it." This creates a canvas that helps your lip color adhere better.
Next came a deep-burgundy shade that Haggerty applied with a fluffy eyeshadow brush to the center of the lips. "Blend it out to the edges, over the concealer," she says. While they're beautiful when matte — and far more practical for real life — topping the lips with gloss is an @VladaMUA signature. "Gloss makes every beauty editorial better," Haggerty jokes.
Melt Cosmetics Lipstick In Dark Room, $19, available at Melt Cosmetics; My Kit Co. My Defining Crease Brush 1.3, $25.01, available at My Kit Co; Theory Brixmill Admiral Crepe Blazer, $445, available at Bloomingdale's.
PHOTOGRAPHED BY DAVID CORTES.
No surprise here: Haggerty is a liquid-lipstick devotee, but her favorite brand may not be one you've tried. "Jeffree Star's lipsticks are crazy-pigmented, and you can get a super-sharp line if you use a thin, angled brush," she says. Which also saves her time. "I like to make my work as perfect as possible, so I don’t have to spend a lot of time retouching," she says.
PHOTOGRAPHED BY DAVID CORTES.
Haggerty's kit is stocked with every gloss you could ever need, from thin and liquid-y (perfect for drips, which you'll see ahead) to thick with a high-shine finish, like she used here.
For the final step, Haggerty topped model Ella's lips with a single coat of Mehron Glosstone in Clear, a theatrical-makeup brand you'll see used more than once in this story. "It stays put and creates a great vinyl finish," she says.
Mehron Glosstone Pro in Clear, $11.95, available at Mehron.

PHOTOGRAPHED BY DAVID CORTES.
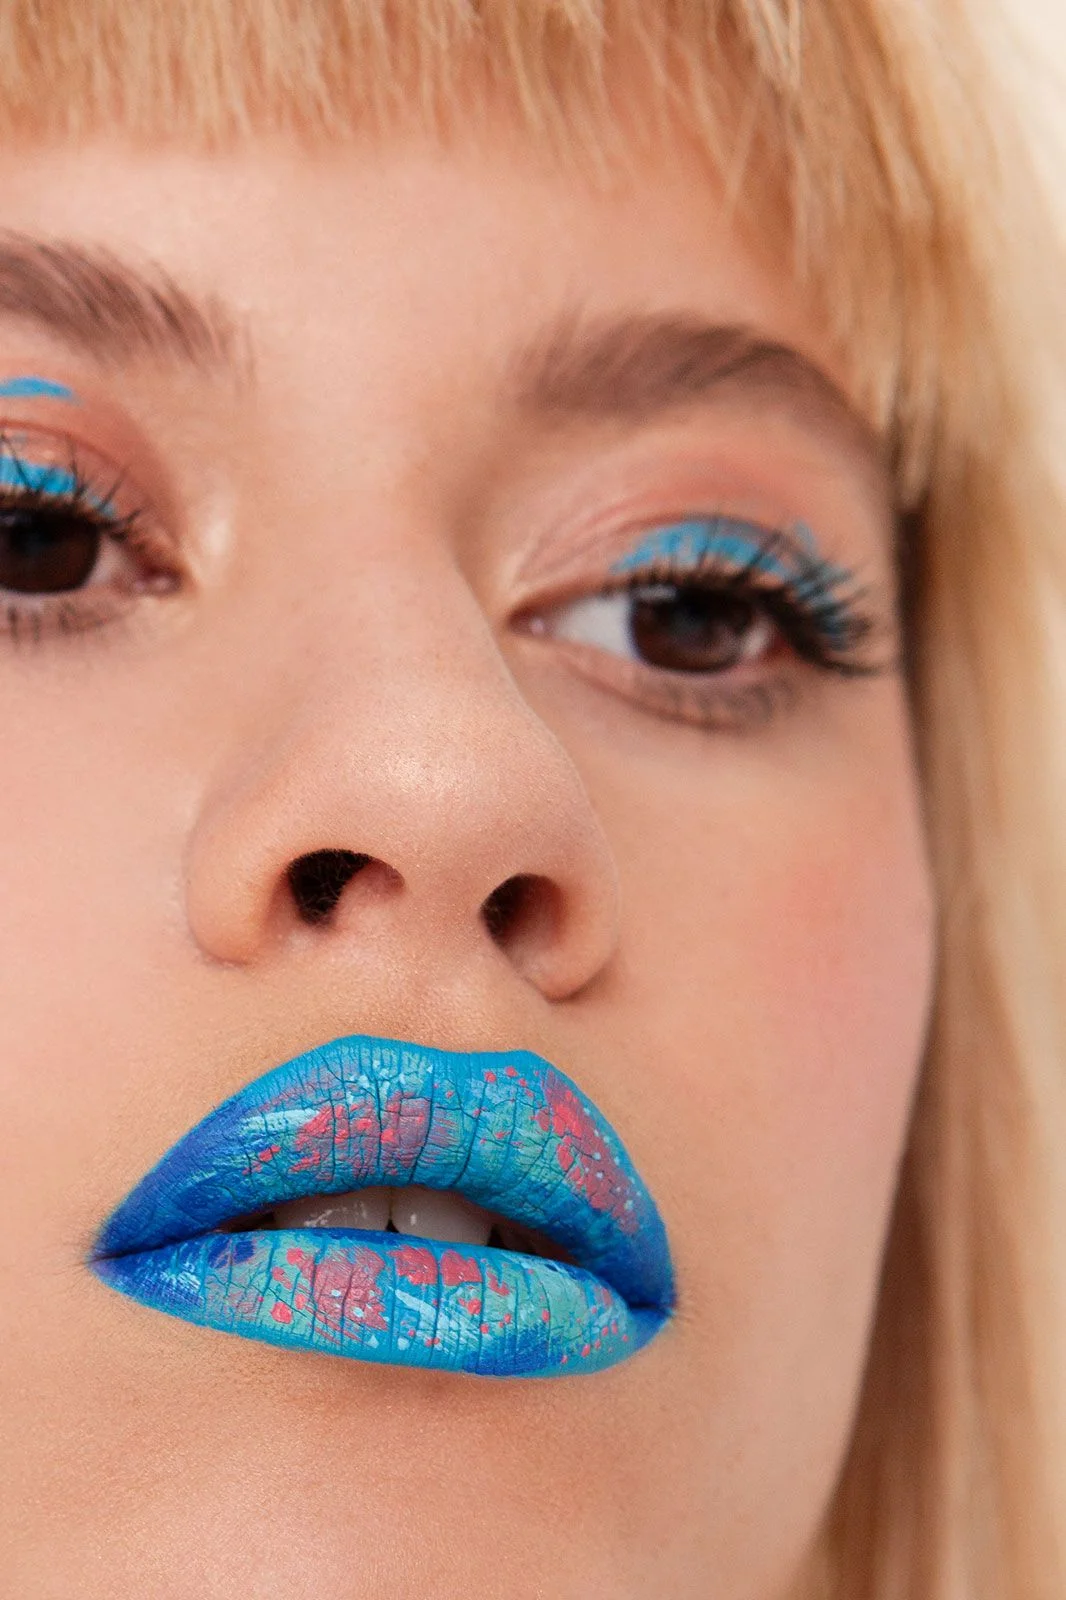
Blue Steel
For this look, Haggerty channeled a macro trend that's splashed all over social media: a colorful splatter that's part Jackson Pollock, part graffiti art. And while it may appear to have been thrown together, it's actually quite precise.
While the coat of blue Jeffree Star Cosmetics Lipstick in Jawbreaker is stunning on its own, the tiny dabs and smears of various colors really ramp up the effect.
Just before shooting the look, Haggerty layered a deep blue called Blue Velvet on the corners of Ella's mouth for depth, while the swipe of blue on her lids was a creative impulse halfway through the shoot. "Gives it a little something," Haggerty says. It does, indeed.
Jeffree Star Cosmetics Velour Liquid Lipstick in Blue Velvet, Jawbreaker, and Breakfast at Tiffany's, $18, available at Jeffree Star Cosmetics; Nyx Liquid Suede Lipstick in Tea and Cookies, $7, available at Nyx Cosmetics; Nyx White Liquid Liner, $7, available at Nyx Cosmetics; COS Draped Layer Dress, $125, available at COS; Lizzie Mandler Petit Square Huggies, $625, available at Lizzie Mandler.
PHOTOGRAPHED BY DAVID CORTES.
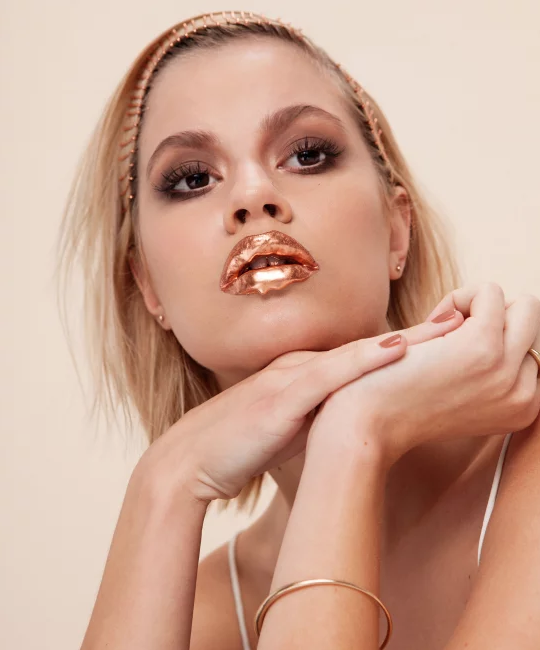
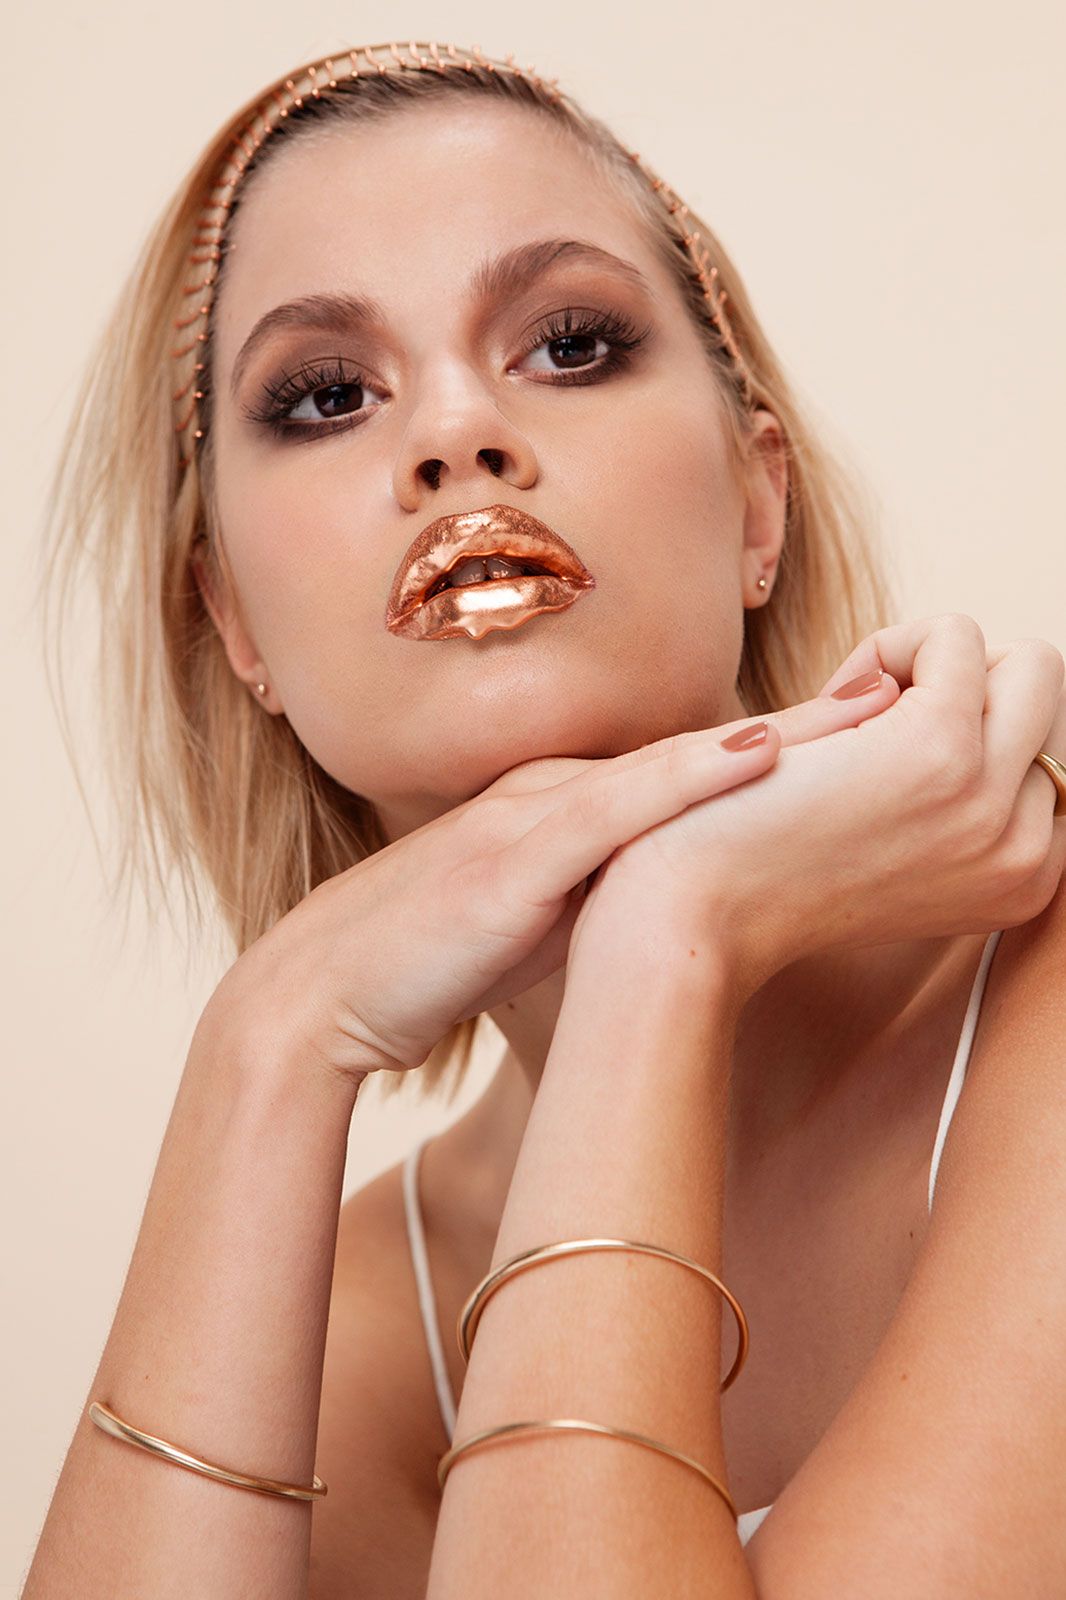
The Signature Drip
Haggerty knew she was on to something as soon as she snapped one of her most popular looks. "I thought it would get me a lot of likes, but I didn't think there would be drama," she tells us.
Don't get her wrong: Haggerty loves to see her work shared in any capacity — but with the proper credit. Not much to ask when you consider the time and effort it takes to style just one of these shoots.
This look starts simply — just Mehron metallic pigment and inexpensive lip gloss, since it tends to be thinner and better at dripping, Haggerty says. The technique, however, is all about timing.
"When I put it on it looks uneven and goopy, but if you leave it alone it will settle," she says. On set, Haggerty applied a thick layer in the makeup chair, then really gobbed it on once Ella got in front of the camera. "I use excessive amounts just to make that super-liquid metal look," she says. Then, it's a game of luck — and catching the product before it hits your shirt.
Sally Girl Mini Squeeze Tube Lip Gloss Minty Fresh, $.99, available at Sally Beauty; Mehron Metallic Powder in Copper, $9.95, available at Mehron; Camilla and Marc Inhale Top, $299, available at Camilla and Marc; Tiffany Kunz Ball Stud, $110, available at Tiffany Kunz; Tiffany Kunz Medium Balance Ring, $720, available at Tiffany Kunz; Tiffany Kunz Balance Bangle, $1,440, available at Tiffany Kunz; Tiffany Kunz Bracelet 5, $87, available at Tiffany Kunz; Tiffany Kunz Balance 3, $87, available at Tiffany Kunz.

PHOTOGRAPHED BY DAVID CORTES.
"At first, people thought it was strange, and it is kind of strange," Haggerty admits. "But there is something about capturing that frozen moment that you can keep forever."
Amid the praise, Haggerty is quick to say that she is not the creator of the dripping-lip editorial look. "It’s not my contribution," she says. "People have done it before. My original inspiration to do lip art came from a British makeup artist named Karla Powell."
But Haggerty has definitely put her own spin on everything, and she isn't stopping at a drip. Lately, she's been experimenting with other metallic mixtures to get different effects.
This gold rendition, for example, is not the result of garden-variety ingredients. "It's actually pigment mixed with a cucumber mask," she says. "You know, the kind that comes in the pouches." It did not, however, peel off to reveal smoother lips. "It just kind of crumbed and flaked off," she says with a laugh.

PHOTOGRAPHED BY DAVID CORTES.
Two-Sided
This glitter lip is the only one that Haggerty's ever worn out on the town. In fact, she doesn't wear much makeup. "I think that's because I get my creative fix with my art," she says.
To create this high-shine, glitter effect, Haggerty first applied a coat of matte lipstick from Nyx. Then, she pressed on a bit of glitter with her finger while the formula was still tacky. "I've tried to do it with a lip brush or a shadow brush, but it flakes away," she says. A coat of NARS gloss on the bottom lip tops things off.
Nyx Liquid Suede Lipstick in Vintage, $7, available at Nyx Cosmetics; NARSLarger Than Life Lip Gloss in Rouge Tribal, $26, available at NARS; Graftobian Powdered Glitter in Goth Garnet, $5.49, available at Graftobian; French Connection Whisper Light Fitted Dress, $198, available at Bloomingdale's; Tiffany Kunz Petite Origin Studs, $260, available at Tiffany Kunz.

PHOTOGRAPHED BY DAVID CORTES.
In the Wild West of beauty editorials — i.e. Instagram — the question eventually arises: What is stealing, and what can be called inspiration?
It's a sensitive subject for Haggerty, who has been bullied online for calling out celebs who post her work without credit, most recently Britney Spears. "All I got from that was a lot of really, really hateful people on my page," Haggerty says. "Grown adults calling me the 'c' word and saying I was ungrateful; it was shocking."

PHOTOGRAPHED BY DAVID CORTES.
Crystal City
Haggerty's work often features nail decals and crystals, which she affixes with eyelash glue after a coat of matte lipstick. "I have no patience for tweezers," she says. Instead, she puts a dab of Embellie Gellie, which you can find at a craft store, on the end of a makeup brush (not the bristle side), picks up the decal or stone, and places it on the lip.
Haggerty notes that it isn't impossible to leave the house with a Swarovski pout (though it's perhaps even less wearable than a glitter top lip). "Although it would be super-inconvenient to talk, or eat, or smile, or function in general," she jokes. "Minor details!"
Anastasia Beverly Hills Liquid Lipstick in Blush and Pure Hollywood, $20, available at Anastasia Beverly Hills; Mehron Glosstone Pro in Coral Reef, $11.95, available at Mehron.

PHOTOGRAPHED BY DAVID CORTES.
Our final question was one we couldn't help but think about all day: Does it feel liberating or crushing to wipe away all that good work after you get the shot? Luckily for us, Haggerty has spent just as much time thinking about this. "It’s so satisfying to wipe it off," she immediately fires back. "Shooting is hard. If you close your mouth, it’s going to ruin everything. So as much as you're thinking, Oh, check me out, you cannot wait to wipe it off."
Maje dress.